
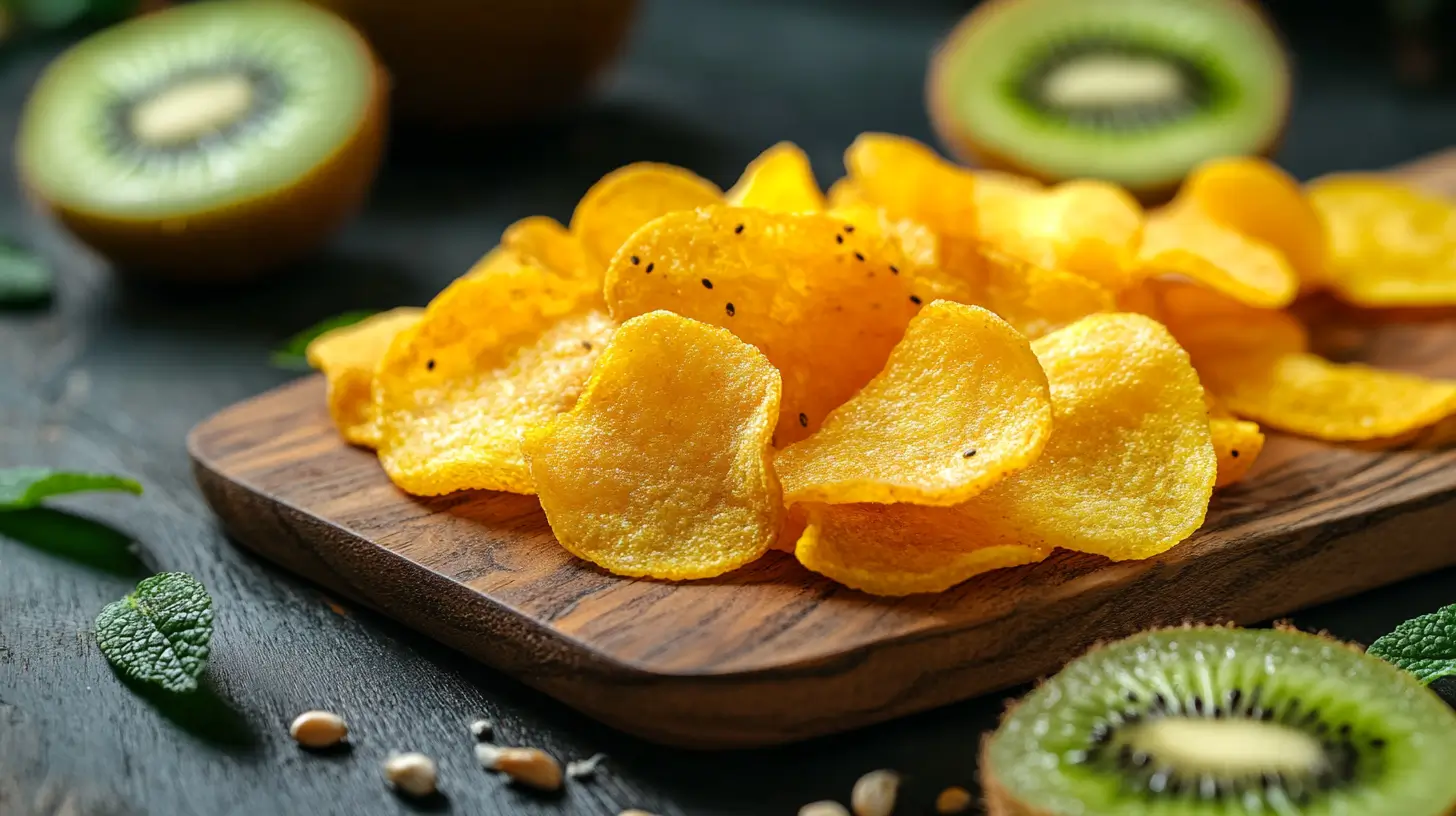
Golden Kiwi Chips are the perfect snack if you crave something sweet, crunchy, and healthy! These golden bites deliver a bold burst of flavor with just the right balance of tangy and sweet. Even better, they’re super easy to make at home using simple ingredients and basic tools like a dehydrator, oven, or air fryer. Whether you love fruity snacks or want a unique treat packed with natural vitamins and antioxidants, this recipe is exactly what you need!
Table of Contents
In this article, we’ll break down exactly how to make crispy and flavorful golden kiwi chips. You’ll learn about different preparation methods, tips for perfect results, and creative ways to enjoy and store your new favorite snack. Ready to turn your golden kiwis into crunchy chips? Let’s dive in!
Introduction to Golden Kiwi Chips
What Are Golden Kiwi Chips?
Golden kiwi chips are dried slices of golden kiwi fruit that transform into crispy, crunchy snacks with an intense fruity flavor. Unlike traditional green kiwis, golden kiwis have a sweeter and less tart taste, making them perfect for snacking. When dried, they turn into little discs of concentrated sweetness with just a hint of tanginess, similar to sweet-and-sour candies but way healthier.
Think of them as the ultimate guilt-free snack! They’re gluten-free, vegan, paleo-friendly, and packed with fiber and essential nutrients. Plus, they’re a great alternative to potato chips when you’re craving something crunchy but nutritious.
Why Make Golden Kiwi Chips at Home?
Making golden kiwi chips at home gives you complete control over the ingredients and preparation process. No artificial additives, no extra sugar—just pure fruit goodness! While store-bought dried fruit can be expensive and sometimes loaded with preservatives, homemade chips are fresher, healthier, and much more affordable.
Not to mention, they’re ridiculously versatile. You can munch on them as-is, add them to a trail mix, or use them as a topping for salads, yogurt bowls, or desserts. Homemade chips also let you experiment with flavors—add a sprinkle of cinnamon for a cozy twist or chili powder for a spicy kick.
Nutritional Benefits of Golden Kiwi Chips
Golden kiwi chips aren’t just tasty; they’re also a nutrient powerhouse. Golden kiwis are rich in vitamin C, potassium, and antioxidants, which help boost your immune system and support heart health. Drying them into chips preserves most of these nutrients while concentrating their flavors. Each chip is like a little burst of sunshine and goodness!
If you’re watching your calorie intake, you’ll be happy to know that golden kiwi chips are a low-calorie snack. Plus, their high fiber content helps keep you full longer—perfect for when those mid-afternoon cravings hit.
Ingredients and Tools Needed
Making golden kiwi chips at home is a straightforward process, but having the right ingredients and tools will make the process smoother and more enjoyable. Here’s what you’ll need for this golden kiwi chips recipe:
Essential Ingredients
- Golden Kiwis: The star of the show! Golden kiwis are naturally sweeter than green kiwis and have a tropical flavor that enhances the chips.
- Optional Flavor Enhancements: You can add a pinch of cinnamon, honey, or even chili powder to spice things up. For savory chips, consider a dash of sea salt.
Recommended Equipment
- Dehydrator: The best tool for making consistent, chewy or crispy kiwi chips. This method locks in the flavor while preserving nutrients.
- Oven: A reliable alternative if you don’t own a dehydrator. Make sure it has a low-temperature setting for even drying.
- Air Fryer: A quick option for those short on time. It produces crispy chips in minutes with minimal effort.
- Sharp Knife or Mandoline: Precise slicing ensures your chips dry evenly, giving them that perfect crunch.
For additional tips on using a dehydrator or air fryer, check out this related guide on Sweet Potato Chips for even more snack inspiration!
Preparing Golden Kiwi for Chips
Step-by-Step Preparation
Before jumping into the drying process, it’s crucial to properly prepare your golden kiwis. This ensures the best texture and flavor in your final product.
- Wash the Kiwis Thoroughly: Golden kiwis should be rinsed under running water to remove any dirt. For a deeper clean, soak them in a 50/50 vinegar-water solution for a few minutes.
- Peeling (Optional): If you prefer smoother chips, peel the kiwis using a vegetable peeler. The skin is edible but can become slightly tough when dried.
- Slice Evenly: Use a sharp knife or mandoline to slice the kiwis into ¼-inch thick rounds. Consistency is key here—thicker slices take longer to dry and may end up chewy instead of crisp.
Optional Seasoning for Sweet or Savory Flavors
Golden kiwi chips taste amazing on their own, but you can elevate their flavor with a sprinkle of spices:
- For Sweet Chips: Add a light dusting of cinnamon or drizzle them with honey before drying.
- For Savory Chips: Try a pinch of sea salt or even a dash of cayenne pepper for a spicy kick.
Pro Tips for Perfect Slices
- Uniformity Matters: Keep your slices as even as possible to avoid uneven drying.
- Don’t Overlap: When placing kiwi slices on your dehydrator trays, baking sheet, or air fryer rack, ensure they’re in a single layer with enough space for air circulation.
Taking time to prepare your golden kiwis properly will set you up for snack success. Now that you’re ready, the next step is choosing your drying method: dehydrator, oven, or air fryer.
Methods for Making Golden Kiwi Chips
There are several ways to prepare golden kiwi chips at home, and each method has its own benefits. Whether you prefer using a dehydrator, oven, or air fryer, following these instructions will help you achieve perfectly crispy or chewy chips every time. Let’s break it down step by step.
Dehydrating Method: The Best for Maximum Flavor
Using a dehydrator is one of the easiest and most reliable ways to make golden kiwi chips. This method ensures that the chips retain their flavor and nutrients.
- Set Up Your Dehydrator: Preheat it to 135°F (57°C). If your machine doesn’t have a preheat function, just turn it on while you prepare your kiwi slices.
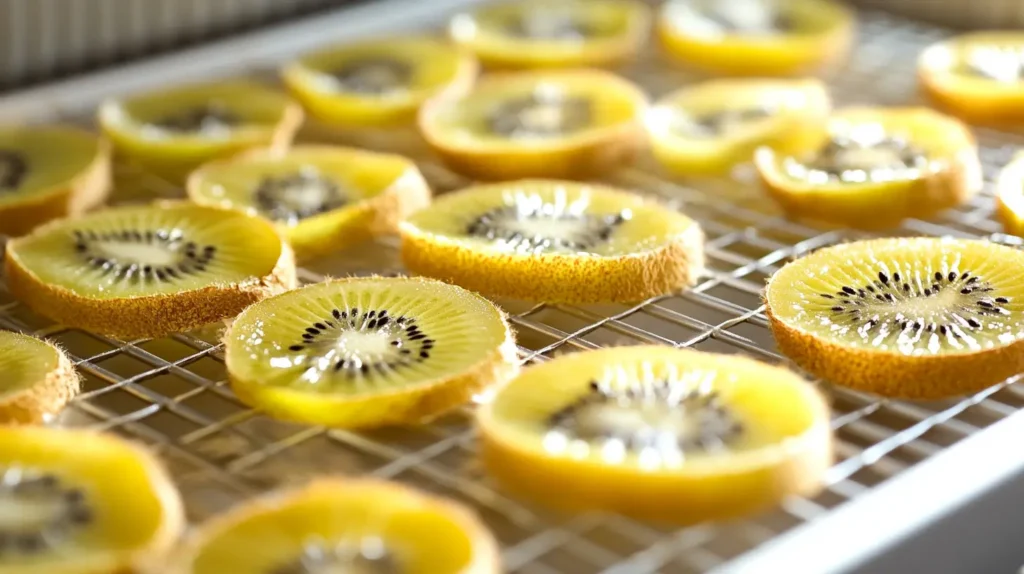
- Arrange the Kiwi Slices: Place the slices on the trays in a single layer, making sure they don’t overlap. Proper air circulation is key.
- Drying Time: Let the kiwis dehydrate for 8–12 hours. Check for doneness by touching the chips—if they’re dry but slightly flexible, they’re ready. For extra-crispy chips, let them dry longer.
Pro Tip: Rotate the trays every few hours for even drying.
Oven-Baked Method: A Convenient Alternative
No dehydrator? No problem! The oven works well for this golden kiwi chips recipe, though it requires a bit more attention.
- Preheat the Oven: Set it to 140°F (60°C) or the lowest temperature available.
- Prepare a Baking Sheet: Line it with parchment paper to prevent sticking. Place the kiwi slices in a single layer.
- Bake Low and Slow: Bake the slices for 4–6 hours, turning them over halfway through. Keep the oven door slightly open to allow moisture to escape.
Pro Tip: Use a cooling rack on top of your baking sheet to improve airflow around the slices for a more even result.
Air Fryer Method: Fast and Crispy
The air fryer is perfect for making quick golden kiwi chips. While it’s not as hands-off as the other methods, it delivers crispy results in a fraction of the time.
- Preheat the Air Fryer: Set it to 330°F (165°C).
- Arrange the Slices: Place the kiwi slices on the fryer basket in a single layer. You may need to work in batches.
- Cook: Air fry for 5–7 minutes, flipping the slices halfway through. Monitor closely to prevent burning.
For a quick guide on using an air fryer for snacks, you might want to read about Sweet Potato Chips for more air fryer inspiration!
Storing and Serving Golden Kiwi Chips
Once your golden kiwi chips are perfectly dried, the next step is to store them properly so they stay fresh and delicious. These sweet, tangy snacks are not only easy to make but also easy to enjoy on the go.
Proper Storage for Maximum Freshness
To maintain their texture and flavor, it’s important to store your golden kiwi chips in an airtight container. Mason jars or resealable plastic bags work well.
- Room Temperature: Store in a cool, dark place for up to two weeks.
- Refrigeration: Extend their shelf life by keeping them in the refrigerator for up to a month.
- Freezing: For long-term storage, freeze them in an airtight container for up to three months.
Always check for signs of moisture or spoilage before eating if they’ve been stored for a while.
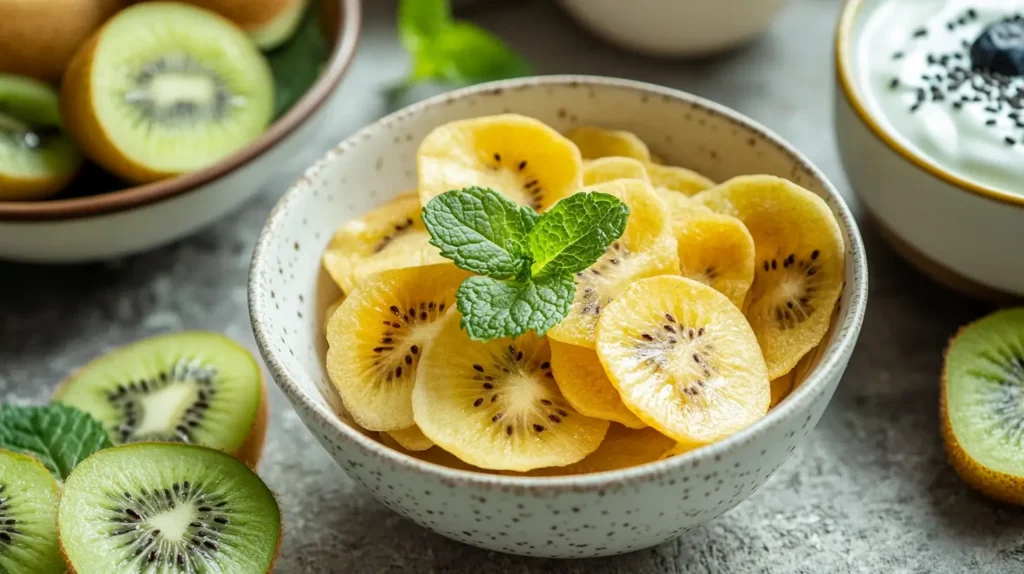
Serving Suggestions: Versatile and Delicious
Golden kiwi chips are a great addition to many dishes and snacks. Here are some ideas to get you started:
- On-the-Go Snack: Enjoy them straight out of the container for a quick energy boost.
- Toppings: Sprinkle them on yogurt, oatmeal, or smoothie bowls for added crunch and sweetness.
- Dessert Garnish: Use them to decorate cakes, pies, or ice cream for a fruity touch.
- Trail Mix: Combine with nuts, dried berries, and seeds for a homemade trail mix.
For more delicious snack recipes, check out other fruit-based options on ExellentRecipes.com!
Common Issues and How to Avoid Them
Even the best cooks run into a few bumps when making golden kiwi chips. Don’t worry—most problems are easy to solve with a few simple adjustments. Below are the most common issues and how you can avoid them to get perfect results every time.
Why Are My Chips Too Soft or Chewy?
A common issue when making golden kiwi chips is ending up with slices that are too soft or chewy rather than crispy. This usually happens when the drying process is incomplete.
How to Fix It:
- Ensure your kiwi slices are evenly cut. Uneven slices may dry at different rates.
- If you’re using a dehydrator or oven, increase the drying time in 30-minute increments until the chips are no longer sticky.
- For oven-drying, keep the door slightly open to let moisture escape.
Pro Tip: For extra-crispy chips, allow the slices to cool completely before storing. Cooling helps them crisp up naturally.
Preventing Burnt Kiwi Chips
On the flip side, chips can easily burn if the temperature is too high or they’re left in the oven or air fryer for too long. This can give them a bitter taste.
How to Fix It:
- Lower the temperature and extend the drying time. Slow and steady wins the race for this golden kiwi chips recipe!
- Always check the chips regularly, especially if you’re using an air fryer. A few extra minutes can make a big difference.
Improving Flavor and Texture
If your chips lack flavor, consider adding a bit of seasoning before drying. Cinnamon or a touch of honey can make all the difference for sweeter chips. For savory chips, try a sprinkle of sea salt or paprika.
Pro Tip: Fresh, ripe golden kiwis will give you the best-tasting chips. Avoid using overly soft or underripe fruit, as they won’t dry as well.
Health Benefits of Golden Kiwi Chips
One of the best reasons to make this golden kiwi chips recipe is the amazing health benefits. Golden kiwis are not only delicious but also packed with nutrients that make these chips a smart snack choice.
Rich in Vitamin C and Antioxidants
Golden kiwis are known for their high vitamin C content, which helps boost your immune system and fight free radicals. Drying the fruit into chips retains much of that vitamin C, so you still get a healthy dose with every bite.
In addition to vitamin C, golden kiwi chips contain antioxidants that protect your cells and reduce inflammation. This makes them a great snack option for anyone looking to stay healthy while satisfying their cravings.
Low-Calorie, High-Fiber Snack
If you’re watching your weight or trying to eat healthier, golden kiwi chips are a great alternative to traditional snacks like potato chips or candy. They’re naturally low in calories and high in fiber, helping you stay full longer and reducing the temptation to overeat.
Better Than Store-Bought Snacks
Unlike many store-bought snacks, homemade golden kiwi chips have no added sugars, artificial preservatives, or unhealthy fats. You can enjoy them guilt-free, knowing exactly what’s in them. Plus, making them at home is fun and allows you to experiment with different flavors and textures.
These crispy, sweet chips are not only a delicious treat but also a healthy one. So, the next time you’re craving something crunchy, reach for your homemade golden kiwi chips!
Conclusion
In this guide, we’ve walked through every step of creating your own golden kiwi chips recipe, from preparation to storage and even how to fix common problems. Making these chips at home is not only easy but also a fun way to enjoy a healthy snack that’s free from additives and preservatives.
By experimenting with different drying methods—whether it’s a dehydrator, oven, or air fryer—you can customize the texture and flavor to suit your taste. Add a sprinkle of cinnamon for sweetness or a touch of chili powder for a spicy twist. The possibilities are endless!
Beyond their delicious taste, golden kiwi chips offer a variety of health benefits. They’re packed with vitamin C, antioxidants, and fiber, making them a nutritious choice for on-the-go snacking or a crunchy topping for yogurt or salads.
So why not give this golden kiwi chips recipe a try? Once you do, it’s sure to become a regular in your snack rotation. Healthy, tasty, and easy to make—you can’t go wrong with homemade fruit chips.
For more creative snack ideas, check out other fruit-based recipes on ExellentRecipes.com and keep exploring the endless possibilities in your kitchen!
Frequently Asked Questions (FAQs)
When preparing a golden kiwi chips recipe, you might have a few questions about the process. Below are some common queries to help you along the way.
1. Can I Use Regular Kiwi Instead of Golden Kiwi?
Yes! Regular green kiwi works just as well. However, keep in mind that green kiwis are more tart compared to the sweeter golden kiwis. If you prefer a tangier snack, go for green kiwis. For a sweeter flavor, stick with golden ones.
2. How Long Do Golden Kiwi Chips Last?
Stored properly in an airtight container, golden kiwi chips can last up to two weeks at room temperature. For longer storage, refrigerate them for a month or freeze them for up to three months. Always check for moisture or mold before eating.
3. What’s the Best Method for Achieving Maximum Crispness?
For the crispiest chips, slice the kiwis evenly and avoid overlapping them while drying. The dehydrator is the most reliable option, but the oven and air fryer can also yield crispy results if you monitor them closely and allow the chips to cool fully before storing.
4. Can I Add Sweeteners or Spices?
Absolutely! Enhance your chips by adding a dash of cinnamon, a drizzle of honey, or a sprinkle of sea salt. Sweet or savory—get creative and make your chips uniquely yours.
Print
Golden Kiwi Chips
- Total Time: 59 minute
- Yield: 4 Servings 1x
Description
This golden kiwi chips recipe shows you how to make a healthy, crispy snack using a dehydrator, oven, or air fryer. These naturally sweet chips are perfect for on-the-go munching or as a topping for yogurt and salads. Packed with nutrients and free from preservatives, they’re an easy homemade treat everyone will love!
Ingredients
- 6 ripe golden kiwis
- 1 tablespoon honey (optional for extra sweetness)
- ½ teaspoon cinnamon (optional)
- ¼ teaspoon sea salt (optional for savory flavor)
Instructions
Dehydrator Method:
- Wash and peel the golden kiwis (optional).
- Slice them into ¼-inch thick rounds using a sharp knife or mandoline.
- Preheat your dehydrator to 135°F (57°C).
- Arrange the kiwi slices on the dehydrator trays in a single layer without overlapping.
- Dehydrate for 8–12 hours, checking for dryness after 8 hours. The chips should be dry but still slightly flexible.
- Let them cool before storing in an airtight container.
Oven Method:
- Preheat the oven to 140°F (60°C) or the lowest temperature setting.
- Line a baking sheet with parchment paper. Place the kiwi slices in a single layer.
- Bake for 4–6 hours, flipping the slices halfway through. Leave the oven door slightly open to let moisture escape.
- Once the chips are dry and crisp, let them cool completely before storing.
Air Fryer Method:
- Preheat the air fryer to 330°F (165°C).
- Arrange the kiwi slices in a single layer in the air fryer basket.
- Air fry for 5–7 minutes, flipping halfway through. Monitor closely to prevent burning.
- Allow the chips to cool and crisp up before serving.
Notes
- For extra sweetness, drizzle honey on the kiwi slices before drying.
- Adjust drying time based on the thickness of the slices. Thicker slices may need more time.
- Store the chips in an airtight container for up to two weeks. Refrigerate or freeze for longer storage.
- Use the oven method if you don’t have a dehydrator or air fryer.
- Prep Time: 10min
- Cook Time: 5-7 min (Air Fryer)
- Category: Snacks
- Method: Dehydrating
- Cuisine: International
Nutrition
- Serving Size: 1 cup of chips
- Calories: 75
- Sugar: 14g
- Sodium: 10mg
- Fat: 0.3g
- Saturated Fat: 0g
- Unsaturated Fat: 0.3g
- Trans Fat: 0g
- Carbohydrates: 18g
- Fiber: 3g
- Protein: 1.5g
- Cholesterol: 0mg
Keywords: golden kiwi chips recipe, healthy fruit snacks, dried kiwi, air fryer kiwi chips, dehydrated fruit, low-calorie snack, homemade chips


